【Three.js】線の描き方
めざましテレビのオープニングを見て思いついたというウワサ
はじめに
線を自由自在に操れる男になりたい。最近そんな事を考えています。
線1本だけだと、たいしたモノは作れないかもしれないけど、何本も組み合わせてうまく動かせばとてもおしゃれなモノができてしまうでしょう。というかできた。
今回は自分用の備忘録的な意味も込めて、基本的な線の描き方をまとめてみようと思います。
線を1本だけ描いてみる
以前の記事「パーリンノイズでカーテンを作る」でも同じ事をやりましたが、あの時は「まっすぐな線」だったのに対し、今回は「グニャグニャの線」を作るという大きな違いがあります。当然作り方も変わります。
とか言いながら、まずは基本となる「まっすぐな線」を作ってみましょう。
createLine();

//*****************************************
// 線を作成
//*****************************************
function createLine() {
  const points = [];
  const pointNum = 50;
  for (let i = 0; i < pointNum; i++) {
    const x = i;
    const y = 0
    const z = 0;
    const p = new THREE.Vector3(x, y, z);
    points.push(p);
  }
  const geo = new THREE.BufferGeometry().setFromPoints(points);
  const mat = new THREE.LineBasicMaterial({color: 0xffff00});
  const line = new THREE.Line(geo, mat);
  scene.add(line);
}
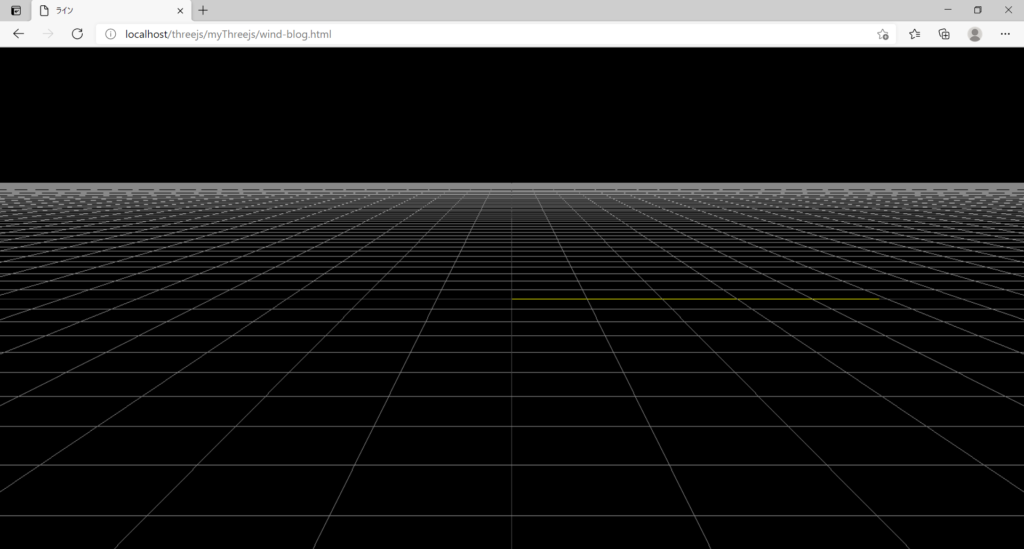
線を作るには、まずは点を作らないといけません。「点と点を結ぶと線ができる」からですね。この例では点を50個作っています。点の数が多いほど、グニャグニャにした時になめらかな曲線になります。まだまっすぐだけど↓。
線を曲げてみる
createLine();

//*****************************************
// 線を作成
//*****************************************
function createLine() {
  const points = [];
  const pointNum = 50;
  for (let i = 0; i < pointNum; i++) {
    const x = i;

    const rad = degToRad(360 / pointNum * i);
    const y = 5 * Math.sin(rad);

    const z = 0;
    const p = new THREE.Vector3(x, y, z);
    points.push(p);
  }
  const geo = new THREE.BufferGeometry().setFromPoints(points);
  const mat = new THREE.LineBasicMaterial({color: 0xffff00});
  const line = new THREE.Line(geo, mat);
  scene.add(line);
}

//*****************************************
// 度→ラジアン
//*****************************************
function degToRad(deg) {
  return deg * Math.PI / 180;
}
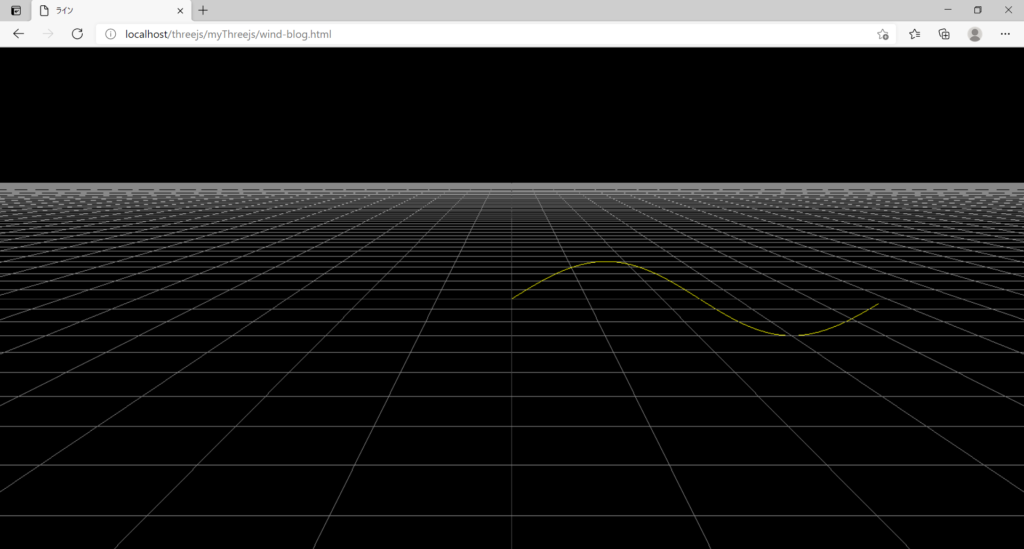
12,13行目のy座標の設定をしている箇所を変更しました。
きれいな曲線を描きたい時は、三角関数のsinとcosを使うといいと思います↓。
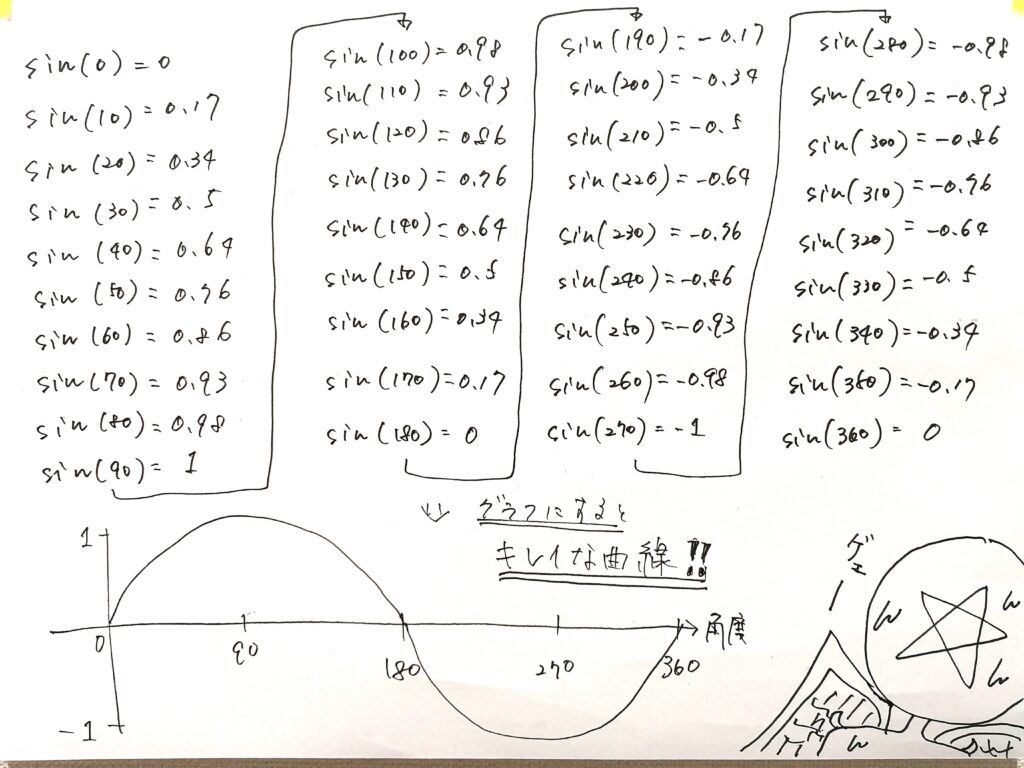
sinの値をそのまま使うと曲線のこんもり具合が小さいので5倍してこんもり具合を大きくしてあげます。するとこうなります↓。
線をアニメーションさせる
曲線を描いただけだと面白くないので動かしてみましょう。正確に言うと「線そのものを動かす」のではなく、「線を描画する範囲を変化させる」ことで、あたかも動いているかのように見せることができます。
const pointNum = 50;
let line;
let start = 0, count = 2;

createLine();

//*****************************************
// 線を作成
//*****************************************
function createLine() {
  const points = [];
  for (let i = 0; i < pointNum; i++) {
    const x = i;

    const rad = degToRad(360 / pointNum * i);
    const y = 5 * Math.sin(rad);

    const z = 0;
    const p = new THREE.Vector3(x, y, z);
    points.push(p);
  }
  const geo = new THREE.BufferGeometry().setFromPoints(points);
  const mat = new THREE.LineBasicMaterial({color: 0xffff00});
  line = new THREE.Line(geo, mat);
  scene.add(line);
}

//*****************************************
// 線を動かす
//*****************************************
function moveLine() {
  line.geometry.setDrawRange(start, count);

  count += 1;
  if (count > pointNum) {
    count = 2;
  }
}

//*****************************************
// 度→ラジアン
//*****************************************
function degToRad(deg) {
  return deg * Math.PI / 180;
}

//*****************************************
// 描画
//*****************************************
function renderScene() {
  moveLine();
  requestAnimationFrame(renderScene);
  webGLRenderer.render(scene, camera);
}32行目で「線を描画する範囲」の設定をしています。setDrawRangeメソッドの第1引数には描画開始点を、第2引数には描画する点の数を渡してあげます。
この線は50個の点から作られているので、例えば
line.geometry.setDrawRange(0, 25);と書くとこうなって↓、
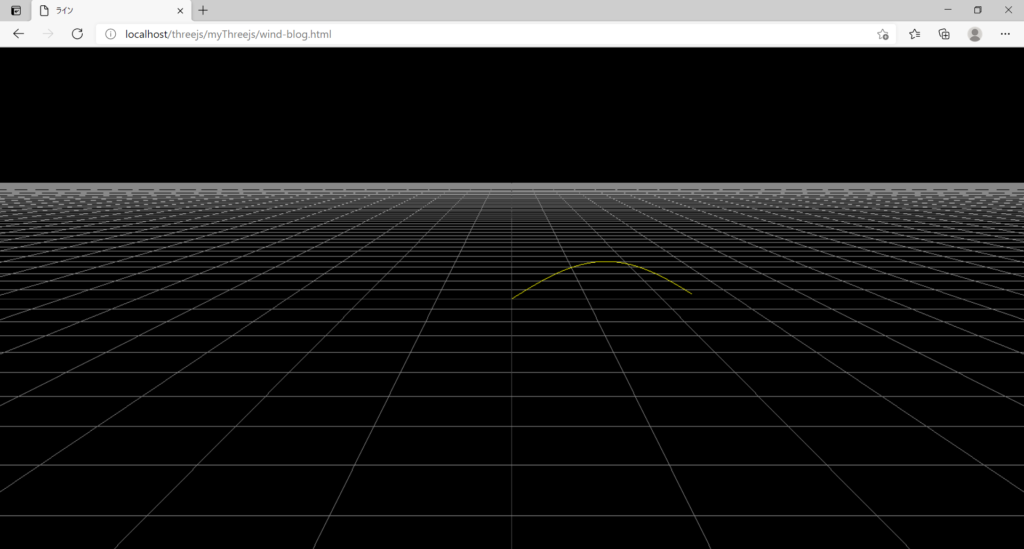
line.geometry.setDrawRange(26, 15);と書くとこうなります↓。
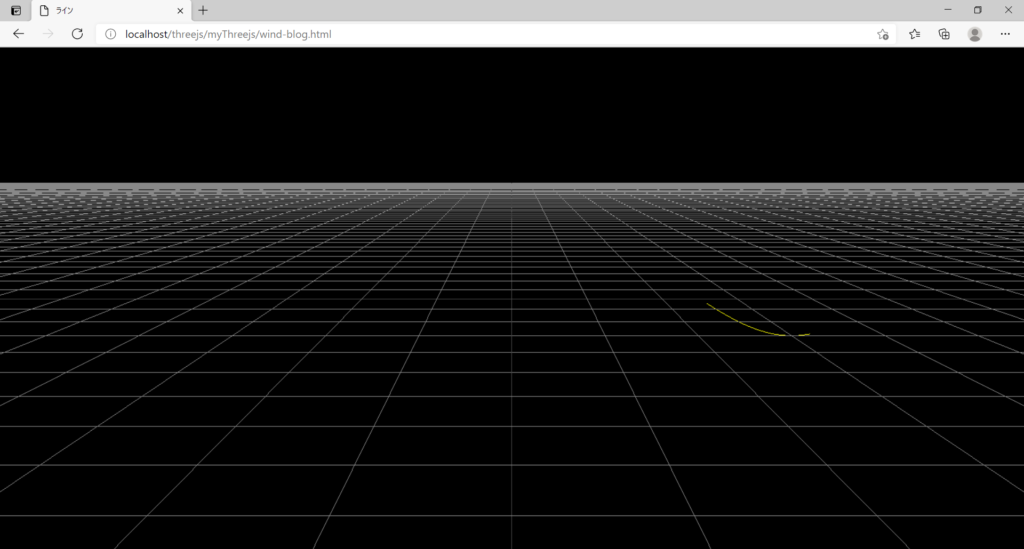
そんなワケでmoveLine関数を描画用のrenderScene関数内で呼んであげれば、描画範囲が変化して線が動いているように見えます。
今回は「描画開始点」を固定して「描画する点の数」は増やしていくことで、線がニュルニュルと伸びていく感じにしています↓(動画)。
伸びてる感じじゃなくて、動いてるように見せたいなら「描画開始点」も変化させましょう↓。
//*****************************************
// 線を動かす
//*****************************************
function moveLine() {
  line.geometry.setDrawRange(start, count);

  count += 1;
  if (count > pointNum / 2) {
    start += 1;
  }
  if (start> pointNum) {
    count = 2;
    start = 0;
  }
}
アレコレやる
ここまでで線の描き方が分かりました。でもこれだけだと物足りないので、線を増やしたり、線の動きを不規則にしたり、線に色を付けたり、カメラを動かしたりするとこうなります↓。
デモサイトはこちら。
全コードを載せておきます。
<!DOCTYPE html>

<html lang="ja">

<head>
  <meta charset="UTF-8">
  <title>リボン</title>
  <meta name="viewport" content="width=device-width, user-scalable=no, minimum-scale=1.0, maximum-scale=1.0">
  <script type="text/javascript" src="./libs/utils/perlin.js"></script>
  <style>
      * {
        margin: 0;
        padding: 0;
      }
      html,body {
          overflow: hidden;
          height: 100%;
      }
  </style>
</head>

<body>

  <div id="screen"></div>

  <script type="module">

    import * as THREE from "./libs/0.128.0/build/three.module.js";
    import { TrackballControls } from "./libs/0.128.0/examples/jsm/controls/TrackballControls.js";

    window.onload = function() {

      let scene, camera, camera2, webGLRenderer, cameraHelper;
      let plane, trackballControls;
      let aspRatio, fov;
      let start = 0, count = 2, length = 100;
      const segmentNum = 500, lineNum = 20;
      const points = [];
      const rainbow = [];
      let deg = 340;

      init();
      createRainbow();
      createStars();
      window.addEventListener("resize", resizeWindow);
      renderScene();

      //*****************************************
      // カメラを動かす
      //*****************************************
      function moveCamera() {
        const time = Date.now() / 10000;
        deg += 360 / segmentNum / 2;
        const rad = degToRad(deg);

        const xx = deg / 50;
        const xy = time;
        const xOffset = 20 * noise.perlin2(xx, xy);
        const x = 100 * Math.cos(rad) + xOffset;

        const yx = deg / 100;
        const yy = time;
        const y = 20 * noise.perlin2(yx, yy);

        const zx = deg / 50;
        const zy = time;
        const zOffset = 20 * noise.perlin2(zx, zy);
        const z = 100 * Math.sin(rad) + zOffset;

        const position = new THREE.Vector3(x, y, z);
        camera.position.copy(position);
      }

      //*****************************************
      // カメラの視点を動かす
      //*****************************************
      function setCameraView() {
        // countは2~500の値をとる
        // pointsは0~499の値をとる→-1しないと要素外を指定してエラー→要素数0は無視されるけどまぁ良し
        camera.lookAt(points[Math.ceil(count) - 1]);
      }

      //*****************************************
      // 星を作成
      //*****************************************
      function createStars() {
        const size = 500;
        const points = [];
        for (let i = 0; i < 2000; i++) {
          const x = Math.random() * (size - -size) + -size;
          const y = Math.random() * (size - -size) + -size;;
          const z = Math.random() * (size - -size) + -size;;
          points.push(x, y, z);
        }
        const geo = new THREE.BufferGeometry().setAttribute("position", new THREE.Float32BufferAttribute(points, 3));
        const mat = new THREE.PointsMaterial({
          size: 2,
          color: 0xffff
        });
        const mesh = new THREE.Points(geo, mat);
        scene.add(mesh);
      }

      //*****************************************
      // 虹を作成
      //*****************************************
      function createRainbow() {
        const time = Date.now() / 10000;
        for (let i = 0; i < 7; i++) {
          // 位置
          const px = i;
          const py = time;
          const n = 5 * noise.perlin2(px, py);
          const rx = n + Math.random() * (2 - -2) + -2;
          const ry = n + Math.random() * (2 - -2) + -2;
          const rz = n + Math.random() * (2 - -2) + -2;

          // 色
          const h = Math.round(360 / 7 * i);
          const s = 100;
          const l = 50;
          const c = new THREE.Color(`hsl(${h},${s}%,${l}%)`);
          rainbow.push(createLine(rx, ry, rz, c));
        }
      }

      //*****************************************
      // ラインを作成
      //*****************************************
      function createLine(rx, ry, rz, c) {
        const lines = [];
        const time = Date.now() / 10000;
        for (let j = 0; j < lineNum; j++) {
          const linePoints = [];
          for (let i = 0; i < segmentNum; i++) {

            // x座標
            // 始点と終点をくっつけたいから"segmentNum - 1"にする
            const x = 100 * Math.cos(degToRad(360 / (segmentNum - 1) * i)) + j * 0.02 + rx;

            // y座標
            const px = i / 40;
            const py = time;
            const y = 5 * noise .perlin2(px, py) + ry;

            // z座標
            // 始点と終点をくっつけたいから"segmentNum - 1"にする
            const z = 100 * Math.sin(degToRad(360 / (segmentNum - 1) * i)) + rz;

            // カメラの視点用
            points.push(new THREE.Vector3(x, y, z));

            // 線のポイント用
            linePoints.push(new THREE.Vector3(x, y, z));
          }
          const geo = new THREE.BufferGeometry().setFromPoints(linePoints);
          const mat = new THREE.LineBasicMaterial({color: c});
          const line = new THREE.Line(geo, mat);
          lines.push(line);
          scene.add(line);
        }
        return lines;
      }

      //*****************************************
      // ラインを動かす
      //*****************************************
      function moveLine() {
        if (count <= segmentNum) {
          count += 0.5;
        }
        if (count > segmentNum) {
          count = 2;
        }
        for (let i = 0; i < 7; i++) {
          for (let j = 0; j < lineNum; j++) {
            rainbow[i][j].geometry.setDrawRange(start, count);
            rainbow[i][j].computeLineDistances();
          }
        }
      }

      //*****************************************
      // 初期化
      //*****************************************
      function init() {
        scene = new THREE.Scene();

        aspRatio = window.innerWidth / window.innerHeight;
        fov = getFov(aspRatio);
        camera = new THREE.PerspectiveCamera(fov, aspRatio, 1, 3000);
        camera.position.set(0, 20, 250);
        camera2 = new THREE.PerspectiveCamera(fov, aspRatio, 1, 10000);
        camera2.position.set(0, 500, 0);
        camera2.lookAt(scene.position);
        scene.add(camera);

        // カメラヘルパー
        // cameraHelper = new THREE.CameraHelper(camera);
        // scene.add(cameraHelper);

        webGLRenderer = new THREE.WebGLRenderer();
        webGLRenderer.setSize(window.innerWidth, window.innerHeight);
        document.getElementById("screen").appendChild(webGLRenderer.domElement);

        // const plane = new THREE.GridHelper(1000, 40);
        // scene.add(plane);

        // trackballControls = new TrackballControls(camera, webGLRenderer.domElement);
        // trackballControls.target = new THREE.Vector3(10, 0, 0);
        // trackballControls.rotateSpeed = 2;
      }

      //*****************************************
      // 度→ラジアン
      //*****************************************
      function degToRad(deg) {
        return deg * Math.PI / 180;
      }

      //*****************************************
      // ラジアン→度
      //*****************************************
      function radToDeg(rad) {
        return rad * 180 / Math.PI;
      }

      //*****************************************
      // ウィンドウリサイズ
      //*****************************************
      function resizeWindow() {
        aspRatio = window.innerWidth / window.innerHeight;
        camera.aspect = aspRatio
        camera.fov = getFov(aspRatio);
        camera.updateProjectionMatrix();
        webGLRenderer.setSize(window.innerWidth, window.innerHeight);
        renderScene();
      }

      //*****************************************
      // 視野角取得
      //*****************************************
      function getFov(aspRatio) {
        let fov;
        if (aspRatio > 1) {
          fov = 25;
        } else if (aspRatio > 0.8) {
          fov = 30;
        } else if (aspRatio > 0.6) {
          fov = 40;
        } else if (aspRatio > 0.5) {
          fov = 50;
        } else {
          fov = 60;
        }
        return fov;
      }

      //*****************************************
      // 描画
      //*****************************************
      function renderScene() {
        setCameraView();
        moveCamera();
        moveLine();
        // const clock = new THREE.Clock();
        // const delta = clock.getDelta();
        // trackballControls.update(delta);
        // cameraHelper.update();
        requestAnimationFrame(renderScene);
        webGLRenderer.render(scene, camera);
        // webGLRenderer.render(scene, camera2);
      }
    }
  </script>
</body>
</html>
あとがき
はい。というワケで今回は線の描き方についてまとめてみました。最後はだいぶ省略した感がありますが、とりあえず1本だけでも描けるようになれば良いと思います。そのあとはアイデア次第でいくらでもおしゃれなモノが作れるようになるのではないでしょうか。今回は以上です。ありがとうございました。
おしゃれ度
★★★★☆

ディスカッション
コメント一覧
まだ、コメントがありません